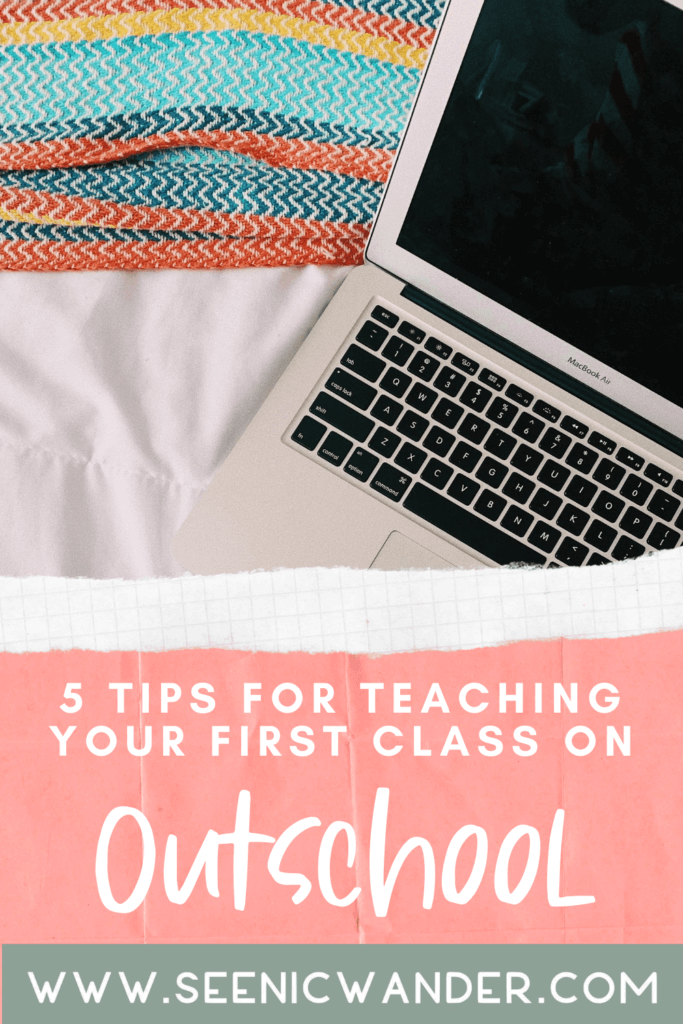
Teaching online with Outschool is a great way to make money online and make an impact on students around the world. But starting any new job can be overwhelming, and you may be wondering what to expect in your first Outschool class. In this post, we’ll take a look at 5 Outschool teacher tips and tricks to make your first class amazing!
But first, what is Outschool and why are teachers so excited by it?
What is Outschool?
Outschool is an online learning platform where you can teach a variety of subjects. While Outschool students come from all over the world, the majority are from North America and classes are primarily taught in English.
One of the coolest parts about Outschool is that you can pretty much teach anything you’re an expert in!
Have a green thumb? Teach a gardening class!
Love to bake? Teach a class about how to make the perfect cupcake!
Total world history nerd? Share your knowledge by teaching a social studies class.
Outschool allows students aged 3-18 to explore a topic they’re interested in – whether it be an academic subject, a life skill, or a new hobby.
Teachers get to make their own classes about topics they love and set their own schedules. Teachers can also set their own pay rate per student and choose the class size they’re comfortable with.
You don’t have to have traditional teaching experience to become an Outschool teacher. You don’t need a university degree or any specific qualifications either. Outschool only requires that teachers are well versed in their content area, at least 18 years old, and from the USA, Canada, Australia, New Zealand or the United Kingdom.
If you’re interested in teaching on Outschool, this page has more information and frequently asked questions.
My First Outschool Class
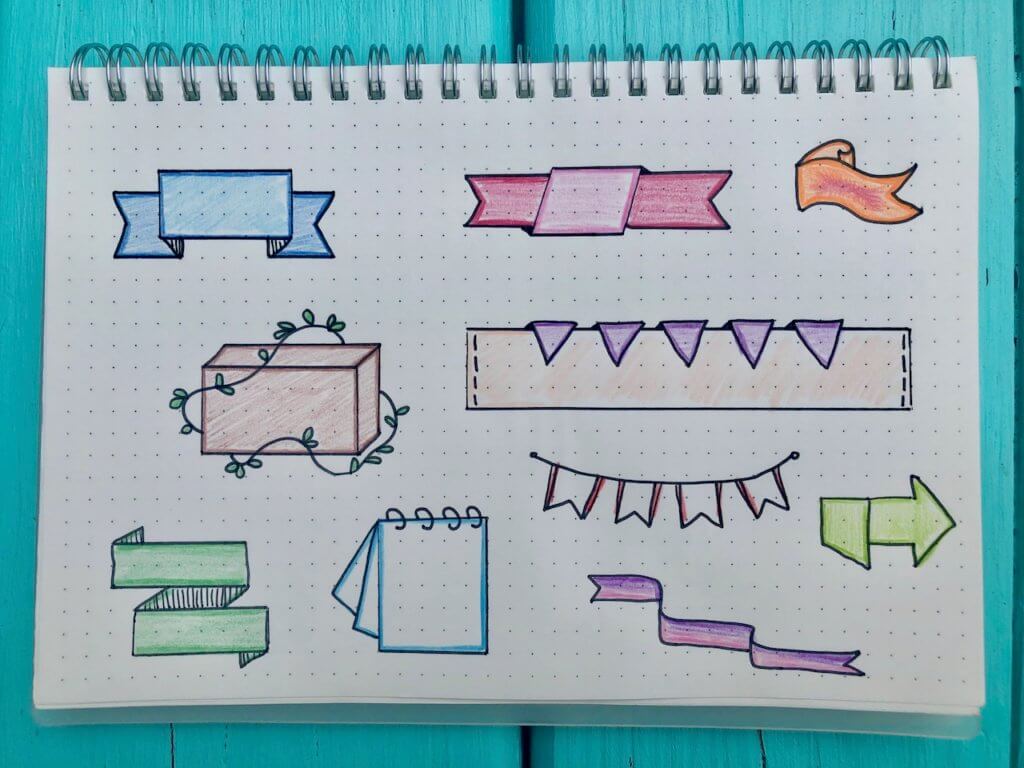
For my first Outschool class, I taught a drawing lesson. We used dot grid paper and a ruler to draw a few different 3D doodle banners and ribbons. We also learned art and geometry vocabulary terms. The class was 30 minutes long and I opened it up to 1-6 students.
I listed my class about two weeks in advance to give students plenty of time to sign up. I had three students enroll in the class. The class size was perfect because it meant every student had a chance to share their work.
How To Create Your First Outschool Lesson
For my first Outschool class, I wanted to pick something I enjoyed that would also be fun for my students. Simplicity was also a priority. I didn’t want to have too many bells and whistles right away.
Starting with a simple, shorter class helped me learn about the Outschool platform and how I should pace my future lessons. I’d recommend keeping your first class around 30 minutes and cap it at around 5-6 students.
Start by brainstorming the topic you would like to teach. I wanted to teach students how to draw a few specific doodles so I practiced drawing the designs several times and wrote out the instructions step-by-step.
Think about how you will introduce your topic to your students. Are there any new vocabulary words you can teach them or overarching concepts that will help them understand the activity better? For my class, we learned the names of different art techniques.
Consider how students will work together. Outschool is collaborative and students usually enjoy participating in discussions. Think about questions you want to ask your students throughout the lesson and remember to call on everyone so that shy and enthusiastic students have equal opportunities to participate.
Example Outschool Lesson Plan
Your general class outline could look something like this:
- Introductions and Icebreaker (2 mins)
- Activity to pique interest (show a video clip, ask about student prior knowledge, etc) (3 mins)
- Introduce new vocabulary words and concepts (3 mins)
- Activity using the new material, asking questions to students throughout (12 mins)
- Allow students to show their work and talk about their thoughts (8 mins)
- Say goodbye/wrap up (2 mins)
What To Expect For Your First Outschool Class
A few days before your first Outschool class, you’ll receive an email reminding you that you have a lesson coming up. Remember to mark it in your calendar and set an alarm so you’re not late.
Before class starts, you’ll go to the Outschool website and click on the “Teach” tab. There, you’ll see the class listed and you can push the large “Start Class” button to enter the Zoom classroom.
You don’t need to have your own Zoom account to teach on Outschool. As a teacher, you’ll be able to use the Outschool Zoom account that is integrated with the website.
As soon as you enter the classroom, the recording for the lesson will start. This recording will be shared with students after the lesson, so Outschool recommends turning off your camera and muting your microphone while getting set up.
Shortly before your the Outschool class time, you’ll start to see students enter the “Waiting Room.” While students are in the waiting room, you cannot see or hear them and they cannot see or hear you. When it is time to start class, you can admit all the students at once.
After admitting all the students at the start of class, plan for a few minutes of settling in. Students might need to adjust headsets or cameras at first, but everyone should be ready to go soon.
Then, you can introduce yourself, do a quick icebreaker, and jump into your lesson.
There isn’t a timer in the Outschool Zoom room, so you’ll be responsible for keeping an eye on the clock and wrapping up class once time is up. Once it’s time to leave, give the students a chance to say goodbye and then select the “End Meeting For All” button in Zoom.
5 Outschool Teacher Tips for Your First Outschool Class
Use The Outschool Teacher Training Materials
Outschool has done a fantastic job of providing teacher training materials. They have extensive documentation explaining how classes work and they also have webinars and free live training sessions you can attend.
These are just a few of the helpful resources they offer, totally for free!
I learn new Outschool teacher tips every time I read through their forums and FAQ posts, so this is a great place to hang out as a new Outschool teacher.
Keep Your First Outschool Lesson Simple
As I was making my lesson, I started out with a long PowerPoint of art terms I wanted to teach. I planned on pulling up pictures and maybe showing a video clip in my introduction.
As I was practicing the lesson, I realized that all this extra information was taking up over half of my class time. It was also complicated to juggle the technology for the PowerPoint slides, videos, and activities I wanted to do. The class was supposed to be about drawing, so I cut back the introductory material and fancy extras to give us more drawing time.
For your first lesson, keep it simple. Stick to one student outcome and one activity.
When I was planning, it felt like I was trying to teach an entire semester’s worth of content in one class. It was over the top and wasn’t really necessary. Sticking to one concise topic will help your students digest the material and prevent you from feeling overwhelmed.
Likewise, you don’t need to incorporate five types of media and use every single zoom feature right out of the gate. You can always add more features like videos, slide shows, and PowerPoints to future lessons once you’re more familiar with the platform and pacing.
I ended up printing out a few vocabulary words and photos to illustrate the most important concepts in my lesson. During the class, I held these images up to the camera for the students to see. For me, using printouts was easier than sharing my screen and setting up a slide show for my first lesson.
Use Zoom Features For Outschool Classes
Before my first Outschool class, I knew I would be using Outschool’s Zoom to host the lesson. But I worried that it would be different from the version of Zoom than I was used to.
I’m happy to report that Outschool Zoom is the same as normal zoom, so you don’t have to worry about getting used to different features.
You’ll be able to do the following during your Outschool class, using the features of Zoom:
Screen Share
You can click the button in the bottom of your Zoom screen that says “Share” and choose to share your computer screen. This is best if you have a PowerPoint or google slides presentation you’d like to share with your students.
Have the presentation pulled up before starting class and click the “Share button,” then select the slideshow you’d like to feature. It will replace your face in the zoom room so students can see the material clearly.
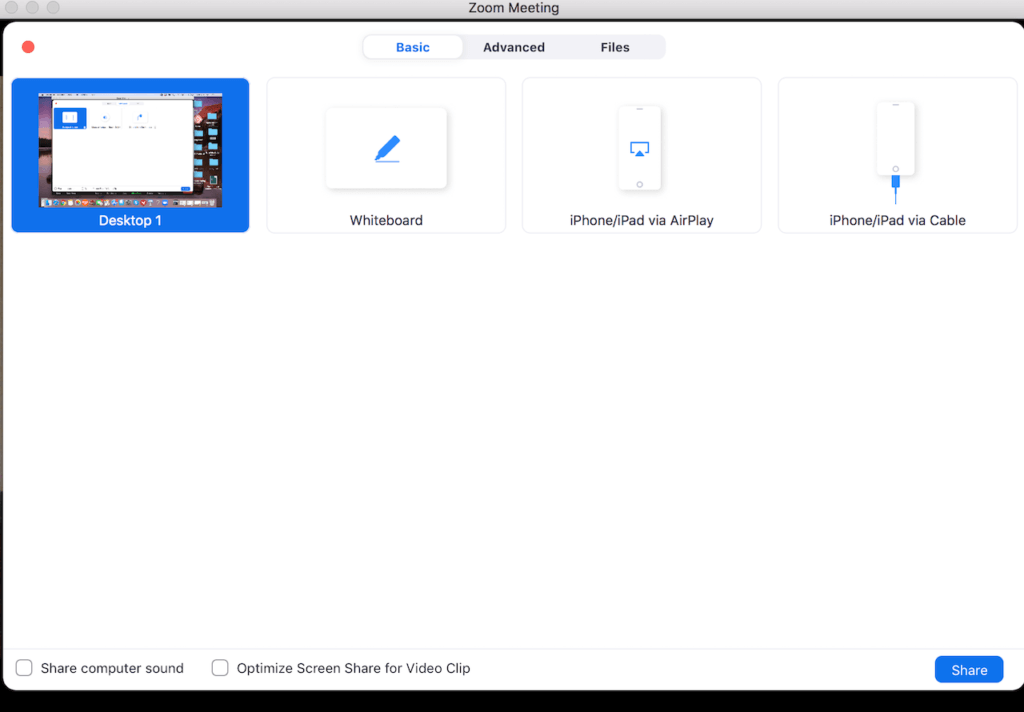
Whiteboard
Click the “Share” button and you’ll have the option to use Whiteboard mode. This lets you draw and write directly on a white screen that is shared with your students.
Highlight Students
If you want to share the screen of a particular student (for example, while they are speaking or presenting), hover over the three dots in the corner of their video and select “spotlight.” This will make them the main screen for all students. When you’re speaking, you can highlight yourself to keep the screen on you.
Mute and Unmute
You can mute and unmute your students throughout the lesson. You can also choose if you want students to be able to unmute themselves or not.
During my lesson, I started out with everyone’s microphones on so we could introduce ourselves and do an icebreaker activity. Then I told the students that I would be placing everyone on mute, but if they had something to say or a question they could raise their hand. I would unmute them and they could speak, but they were also able to unmute themselves if needed.
Raising Hand and Thumbs Up
Zoom allows students to click a thumbs up and a hand raise button. If you’re teaching and you want to do a quick check for understanding without unmuting everyone, ask the students to give you a thumbs up. You’ll see a yellow thumbs-up emoji on their screen when they click the button.
Chat Features
Zoom comes with a chatbox. The Outschool zoom account doesn’t allow students to chat with each other privately. Teachers can choose how students can chat – either with the whole class publicly, with the teacher only, or not at all.
If you choose to allow students to address the whole class in a public chat, Outschool requires that you monitor this chat throughout the class.
Breakout Rooms
Zoom also has the option to divide students into breakout rooms for discussions or group work. Teachers can circulate through the breakout rooms to monitor what is happening in each.
I didn’t use breakout rooms during my lesson, but if this is something you want to use Outschool has a video webinar that explains how it works.
How To Test Outschool Classroom Before Teaching Your First Class
Before teaching my first class, I really wanted to do a practice run. I definitely recommend all new Outschool teachers do this because it helped me work out some of the technical logistics and get a sense of how much time my lesson would take.
Because Outschool Zoom and regular Zoom are the same, you can create a free Zoom account and use it to practice your lesson with a friend or family member. You’ll get a much better sense of how long activities and explanations actually take, and you’ll feel more familiar with the classroom technology.
Start by creating a free Zoom account and select the “Host A Meeting” button in the top corner of the homepage. This will open up a zoom room and you can invite a friend or family member to join the call using the “Participants” – “Invite” buttons in the bottom menu.
Once your friend or family member is in the classroom, play around with different Zoom functionalities and ask the other person what they see. When you’re ready to practice your full class, start a timer and run through it exactly like you will for Outschool. This should help you identify any areas that take longer than expected.
How To Make An Outschool Document Camera
Wondering how to film your hands or your desktop in your Outschool class? I sure was! Because my class was about drawing, I wanted a way to show my hands and tabletop while teaching so that my students could see me drawing and follow along.
I did all this research to try to find out which document cameras would work with Outschool and how I would go about setting it up. I almost bought an expensive new document camera rig, but then I discovered that Teacher Lauren had the answer to my problem!
Teacher Lauren has a video showing you exactly how to use your phone as a document camera for Outschool classes. I used her tips and it worked perfectly!
I didn’t have time to purchase the gooseneck phone holder that Lauren mentions in her video, but I had a tripod with a swivel phone mount that worked great. (The Gooseneck one is linked in Lauren’s video caption if you want to grab one.) I set up the tripod so my phone was horizontal and the camera was facing down over my workspace.
How To Use Your Phone As An Outschool Document Camera Step-By-Step
To use my phone as an Outschool document camera, I followed these steps:
- Download the Zoom app on your smartphone
- Go into the Outschool Zoom classroom a few minutes early
- On the righthand side of the screen, you’ll see a list of participants. At the bottom, you’ll see a button that says invite.
- Click the invite button and a window will pop up to invite someone to the class via email
- Send an email invite to yourself
- Open the email on your phone. You’ll see a link to join the classroom. Click it.
- The link will open in the Zoom app. Make sure to leave the audio off so there isn’t an echo. You should now see your phone listed as a participant in the original Zoom call.
- Place your phone in the tripod or phone stand and position it over your workspace. When you look at the Zoom classroom on your computer, you should see another “Participant” screen which is your phone camera.
- When you want to show your students your hands or something on the tabletop, click the three dots in the corner of the screen that has your workspace. Click “Spotlight” and this will become the main screen.
Teacher Lauren shows you how to do this in the video, so make sure to give that a watch! (Lauren also offers a free Outschool class tracker you can download on her website here!)
Takeaways From My First Outschool Class
Teaching my first Outschool class was so much fun! It definitely made me wish I had started sooner and it was fun to mix it up by teaching a new subject.
It’s important to prepare for your Outschool class, but remember that you don’t have to have everything figured out from day one. You’ll learn as you go and it will get easier with time. The best thing to do is to start!
If you’re considering becoming an Outschool Teacher, I’d say go for it!
- Learn More About The Outschool Application Process
- Ready to start teaching? Sign Up For Outschool Now!
- Read my honest Outschool Teacher Review

Cover Photo by Katerina Jerabkova on Unsplash


Wow – I am so impressed and proud of you for doing this and helping so many others teach. I can almost imagine doing it myself – but almost – I am rather ancient for teaching.
I bet you would make a fabulous online teacher!! Creative writing anyone??
Thank you for sharing the Outschool teaching tips Nic! I am preparing to teach some Science classes to young children. Everything you shared is very helpful.
That’s awesome!! Have so much fun with your students!