If you love traveling, you might have thought about starting a travel blog. Maybe you’re the go-to travel person in your friend group who always has the best itinerary ideas. Maybe you’re a wizard at finding cheap flights, or vegan street food, or Instagram-worthy sunrise spots. Or maybe you’re hilariously accident-prone and tell travel stories that make the entire bar roar with laughter.
In this post, we’ll look at exactly how to start a travel blog so you can share your stories with the world – and even make some money doing it!
Whether you want to write something small for loved ones back home or you want to build a website that could make money one day, we all have to start somewhere. And at the beginning, that “somewhere” looks pretty much the same for everyone.
Starting a blog is a long process. Building something worthwhile and doing it right takes time, so be patient with yourself and enjoy the struggle adventure. This post focuses on the basics of creating a blog that you love.
To answer your question, yes, it is possible to make money blogging. It takes some time and a lot of hard work, but it can pay off. Building your blog to the point where it earns reliable income is a long-haul commitment, so it’s a good idea to start a site that you actually enjoy working on.
Start your blog because you want to tell a story, or because you want to help people, or because it’s just a ton of fun!
Oh, and welcome to the travel blogger family!
 1. Get Organized (aka: Figure out What the Heck you Want to Write About)
Start thinking about your Niche
Writing a travel blog is a lot of fun but finding people to actually read your blog can be difficult. Unfortunately, the travel blog world is very saturated so your blog won’t really go anywhere if you just write generic posts about the places you’ve been.
Unless you’re someone famous (like, say, Beyonce or Michael Scott), your content will need to go beyond just “5 cool things to do in Bali.” You need a Niche, a special thing you offer that makes you unique.
Now, don’t get all bent out of shape about defining your perfect niche right out the gate. When you’re just starting out, you probably won’t know what your niche is – and the best way to figure it out is to start writing and see what resonates with people.
Your blog will grow and change. Your focus will evolve over time. But you should always be thinking about what you can do that sets you apart from the other billion blogs out there.
As you work through these first steps of starting a blog and promoting your work, think about this:
- What do you know well? What topics make you ramble for hours? (Mine are teaching online, house sitting, and lizards… go figure.) Think about what questions your friends always ask you. Do they want to know how you travel so lightly? Write a packing blog! Do they ask you how your pictures always look so amazing? A travel photography blog might be your answer.
- What are the gaps in the market? One of my highest-performing blog posts is about things to do in Columbia SC. It gets attention because there isn’t as much blog content out there about visiting Columbia compared to bigger destinations like New York.
- What would you want to read? Write the blog that you would want to read yourself. Think about what kinds of questions you searched for before traveling abroad and write posts that answer those questions. Write the blog you would have wanted to read before starting your adventure.
Again, you shouldn’t let this stress you out, but do keep it in the back of your mind. You might not even know where your travels will take you and that’s okay. As your blog grows and you learn what your readers respond to, your niche will take shape.
Pick a Blog Name
I swear, picking a name is one of the hardest parts of starting a travel blog. And unfortunately, picking a name is one of the very first things you need to do because you’ll use it for your URL.
My advice: write down every word you can think of related to your niche, your name, and travel in general. Try looking for cool combinations, alliterations, and things that just sound right together. Get your friends and family involved! Names should be…
- Easy to remember
- Easy for people to spell so they can search for you (don’t go crazy with hyphens and stuff!)
- Something that won’t trap you by being too specific. (For example, if you call your blog Sam Sees South America but then decide you really want to travel in Asia, you’re going to have a hard time fitting in your new content.)
Once you have a few options you like, make sure they’re available as a website URL and on social media. Just search the name you want and make sure nothing comes up with that name already. (You can use this handy URL checker from Bluehost below! More on Bluehost in a minute!)
Write your first two pieces of content
A lot of “How to Start a Travel Blog” posts start with setting up your hosting and your website. That’s what I did at first too. But I wish I had written a few pieces of content first for two reasons:
- The next steps involve a bit of financial investment. Even though starting a blog isn’t very expensive, you should take a week or two to write posts and see if this is actually something you enjoy before you pay for a domain name and hosting.
- When you set up your hosting and website, you’re going to want to play with different themes and styles right away. This is hard to do if you don’t have any content. It’s easier to set up a website the way you like if you have a post or two already written when you start.
So my advice:
- Write your “About Me” page as a starting place. Tell the world who you are and why you’re writing your blog! If you need some inspiration, check out my About Me Page here.
- Write your first blog post. It can be about…
- A recent trip you’ve taken
- Your travel bucket list for the upcoming year
- Your favorite travel gear or accessory
- An upcoming trip you’ve planned and how you decided on that place
- What you’re doing to prepare for an upcoming adventure
- A collection of your favorite travel stories/fails/lessons learned
Remember to always run everything you write through an online spelling and grammar checker. My two favorites both happen to be free!
- Grammarly – You can copy and paste text directly to their site for grammar editing or you can download the browser extension for editing in real-time.
- Hemingway App – This one is more of a style editor. It’s helpful for omitting unclear language and avoiding confusing wording.
If you aren’t sure what to write about, you can sign up for my 5-day blog post challenge where we write 5 posts in 5 days! Each day, you’ll receive a prompt and post ideas right to your inbox. You can learn more about the blogging challenge here.

2. Let’s Build a Blog (aka: All the scary technical stuff that’s actually not so scary!)
Get Hosted
Wait, what now… What’s hosting? Don’t worry if you’re lost, I had no idea what hosting meant at the beginning too.
Think of it this way – a blog is like a house. Hosting is like the land that your house is built on. It’s your little corner of the internet that you “rent” where your blog gets to live. Cute, right!?
I’ve had a great hosting experience with Bluehost. Setting up my website was super easy, it’s affordable, and your plan includes your URL and an email address for your site. I’ve never had issues with site speed and their customer support is excellent.

Time for a quick case study
So one time in Thailand, I accidentally crashed my entire site. Like, it was bad. I had tried to do some fancy code stuff but didn’t pay attention and the result was absolute carnage. I panicked and thought I’d have to rebuild my site from scratch. Let’s just say it wasn’t a great day.
I called the Bluehost customer support line all the way from Thailand and they picked up, calmed down the shrieking child on the other end of the line, and helped me restore my site. I was shocked by how easy it was.
They talked me through every step to restore an older version of my site that had been backed up to their servers. Everything was fixed and I was back up and running in a few hours. They were so kind and helpful, even when I was a straight-up raving madwoman.
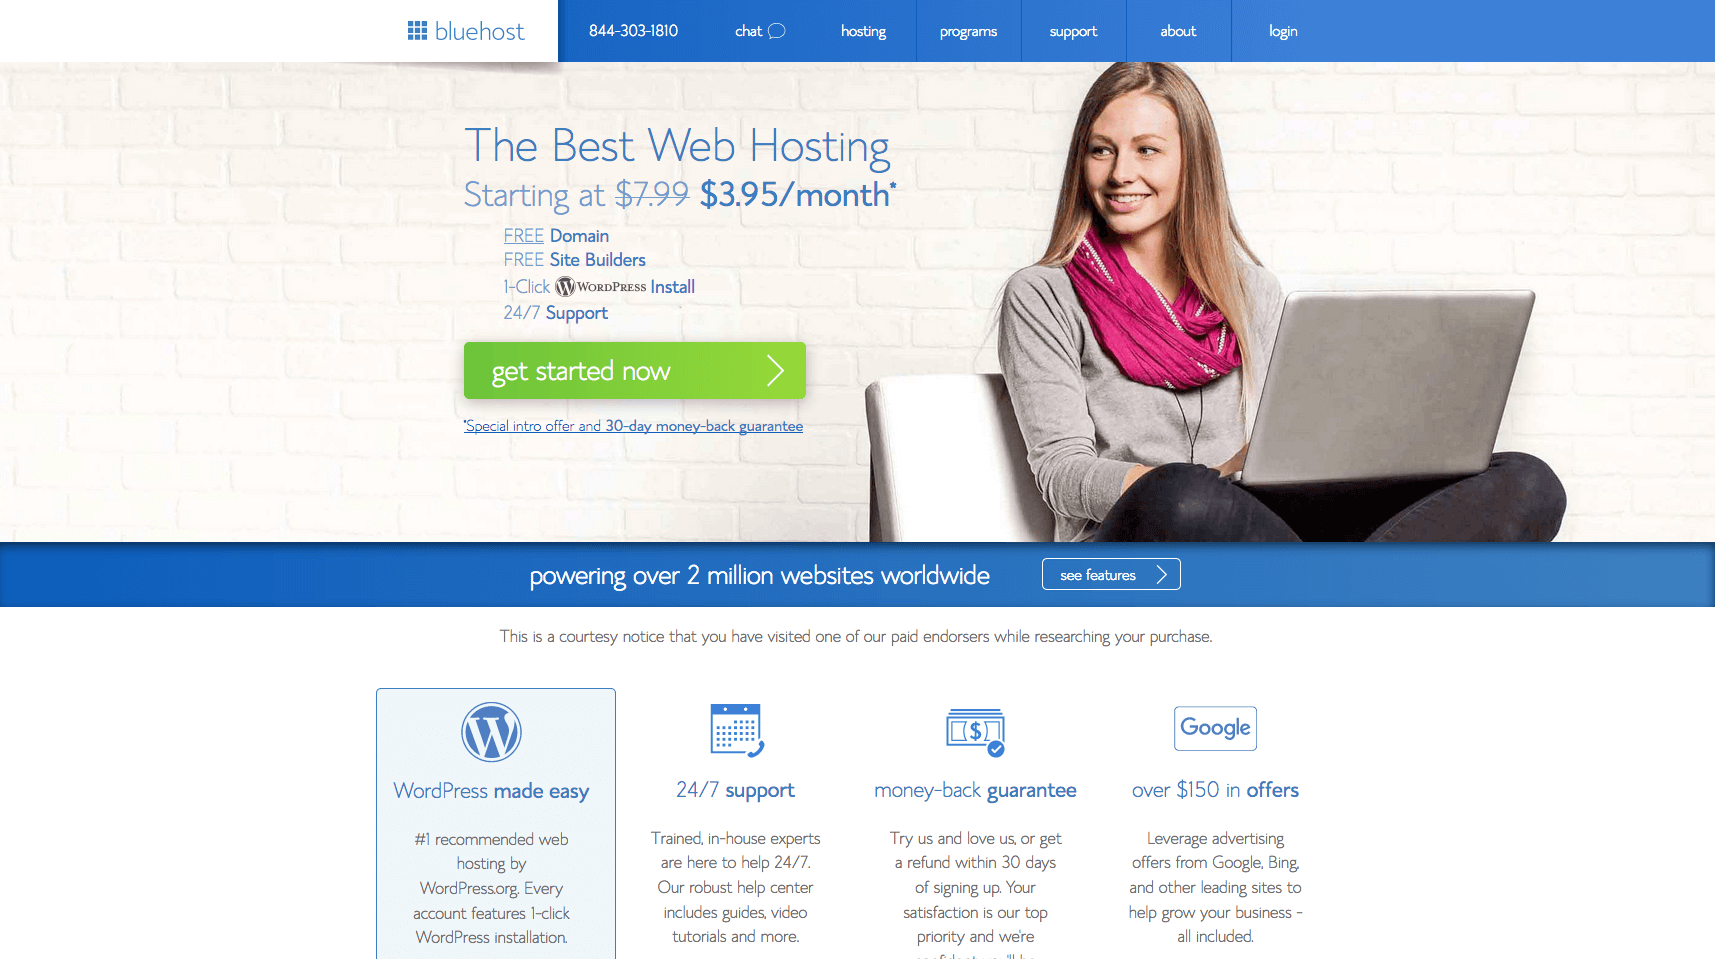
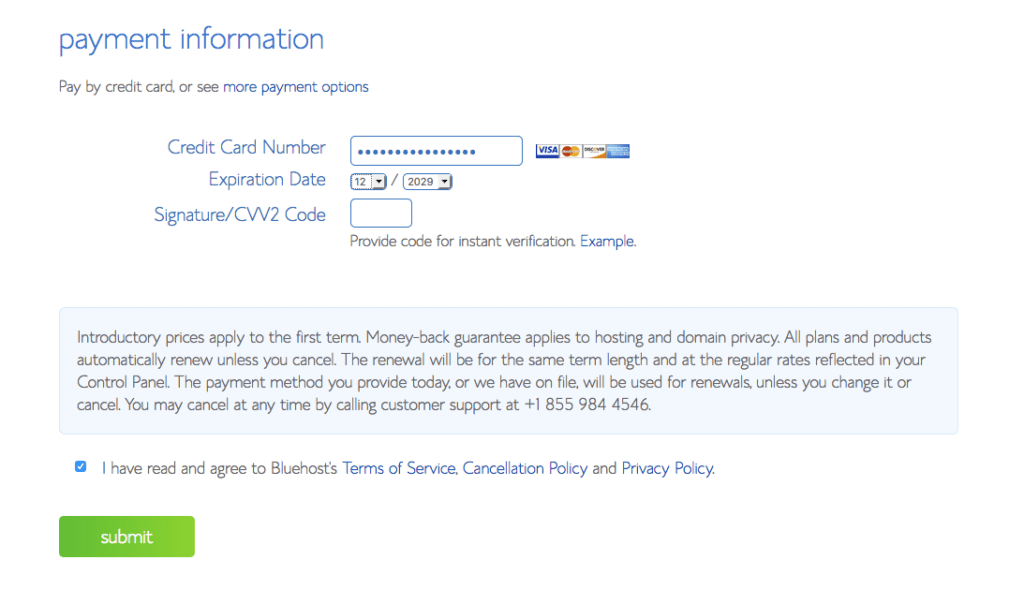
The support is free, the hosting is high quality, and the prices are excellent with monthly plans starting at just $3.95/month. Grab your hosting here.
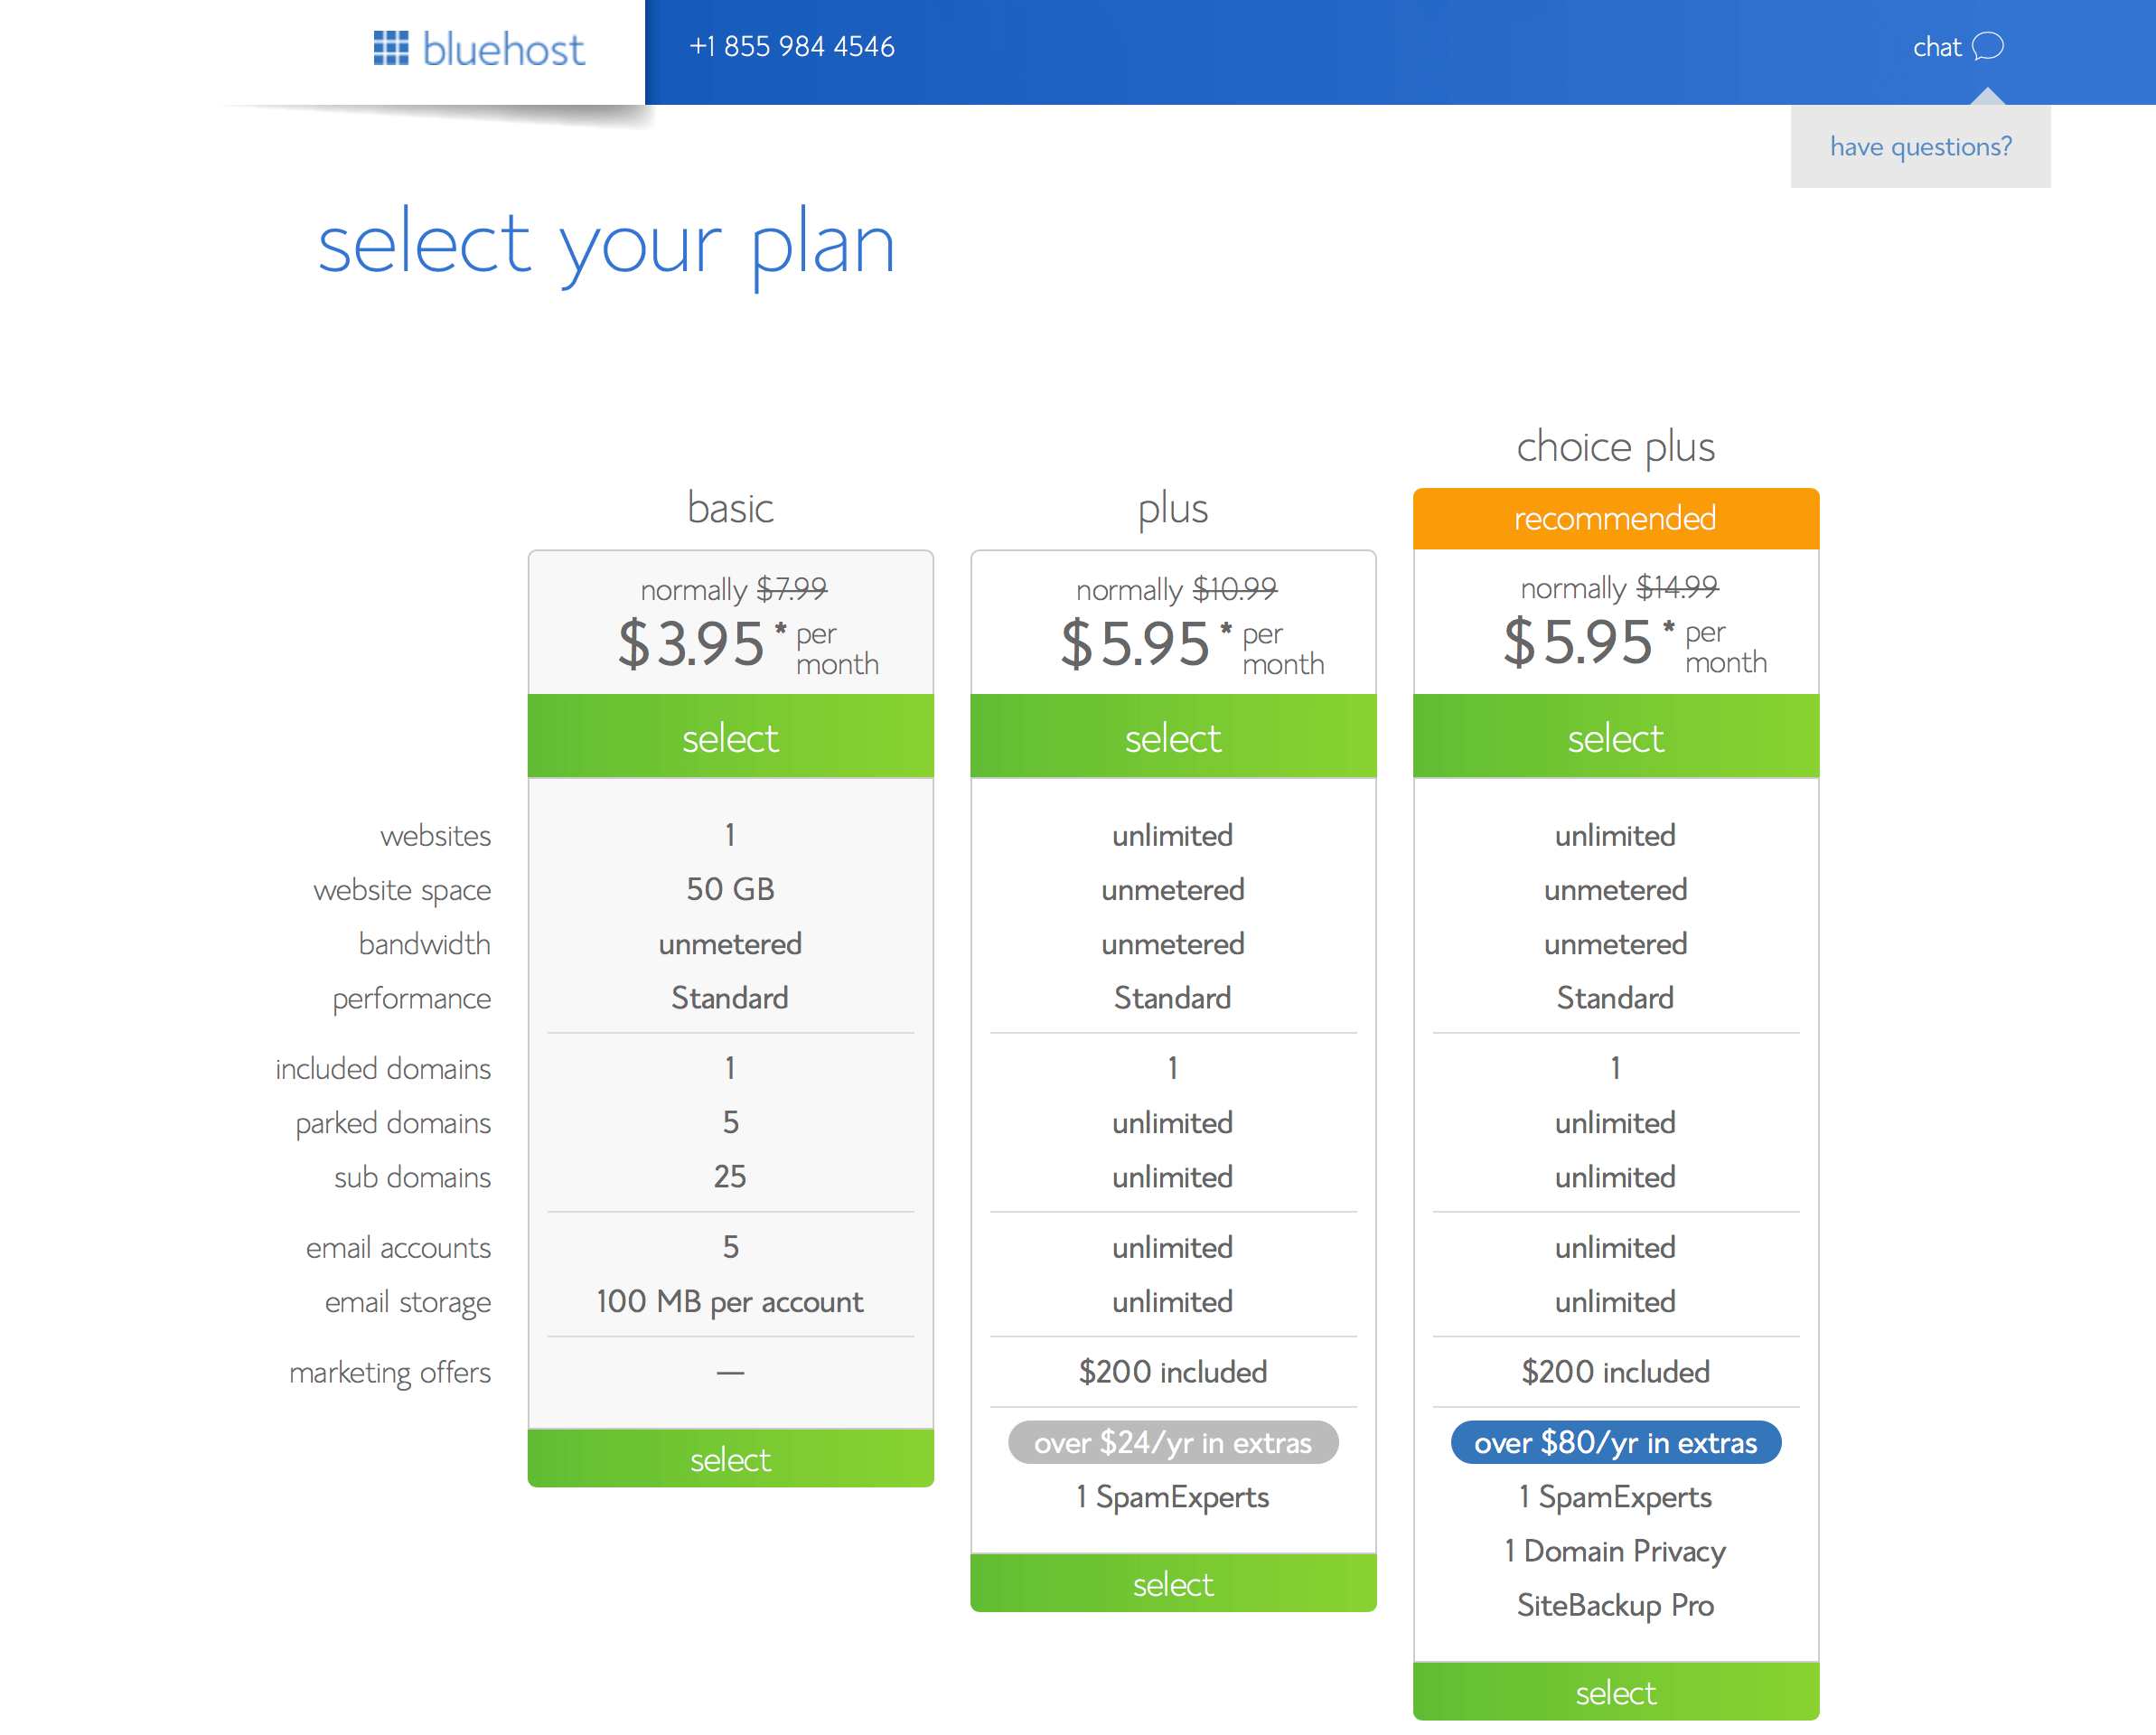
When you’re just starting out, all you need is the basic plan. You can upgrade to plus or choice plus as you continue to grow. Just give Bluehost a call and they can help you upgrade when you outgrow your basic plan.
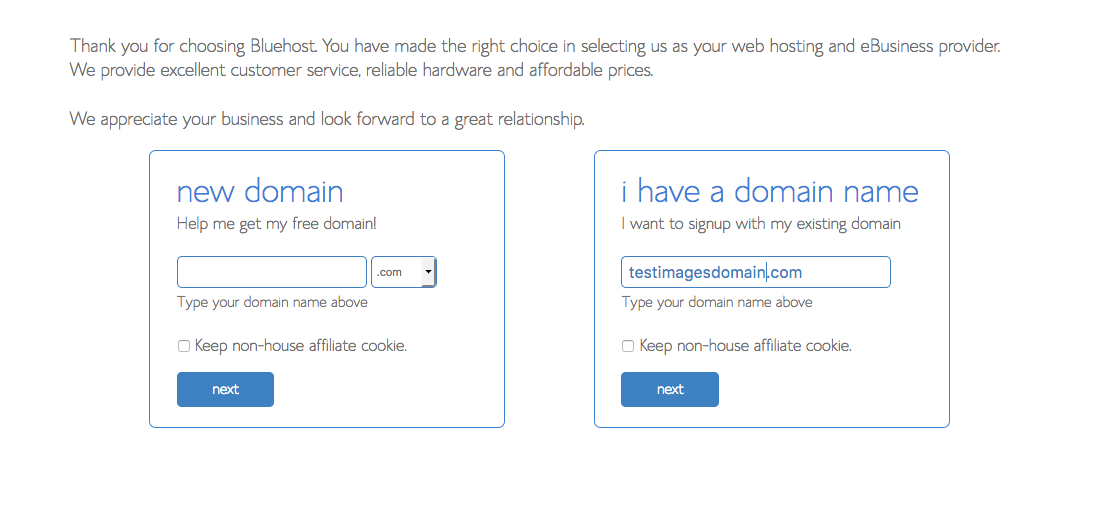
Remember that website name you picked out? Time to make it into your domain! Type in your website name into the “new domain” box and you’ve got yourself a website!
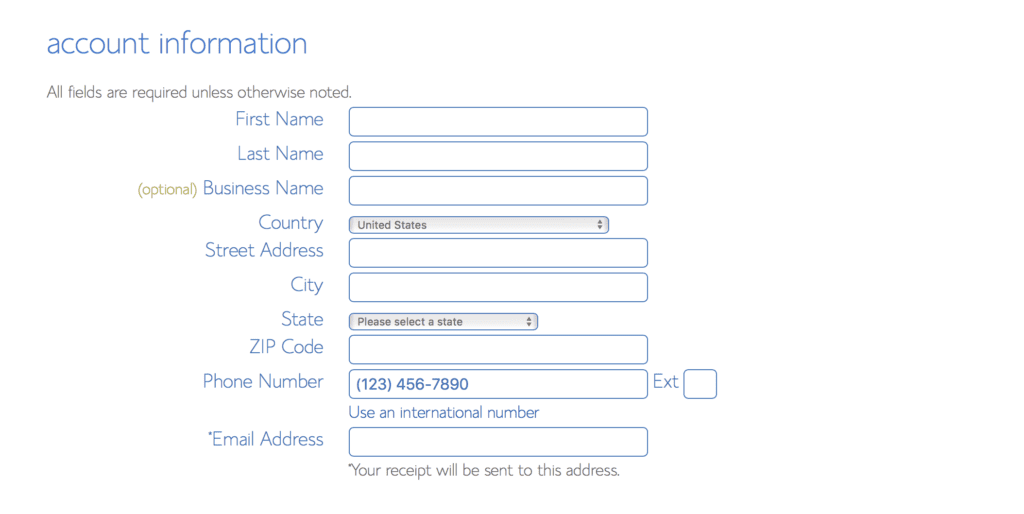
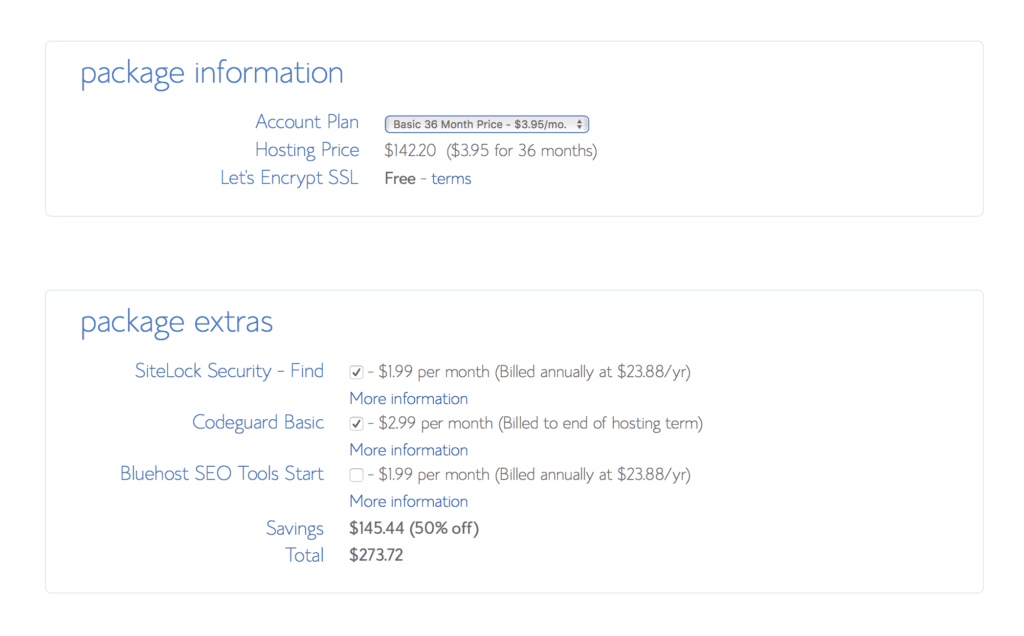
Complete your account information and package information. When you’re first starting out, you’ll have the option to add SiteLock security, CodeGuard Basic, and Bluehost SEO Tools Start.
You can click the information icon under each to read more. SiteLock security is an added level of protection for your website. It can make you look more trustworthy to customers if you are selling a product and can help block spammy attacks on your site.
CodeGuard Basic runs a backup of your site every day and makes it easy to restore your website if something goes wrong. Bluehost SEO gives you tools that will help your site rank higher in google.
When I first made my site, I didn’t opt into any of these services. I eventually added CodeGuard Basic after I accidentally crashed my site not once, but two times.
I really like the peace of mind offered by knowing I can essentially undo any errors I make when I try to get all fancy pants and play with the code.
Remember you can always add these services later if you aren’t sure now. BlueHost is super cool like that and they make it easy to add on or remove services later.
Install Wordpress
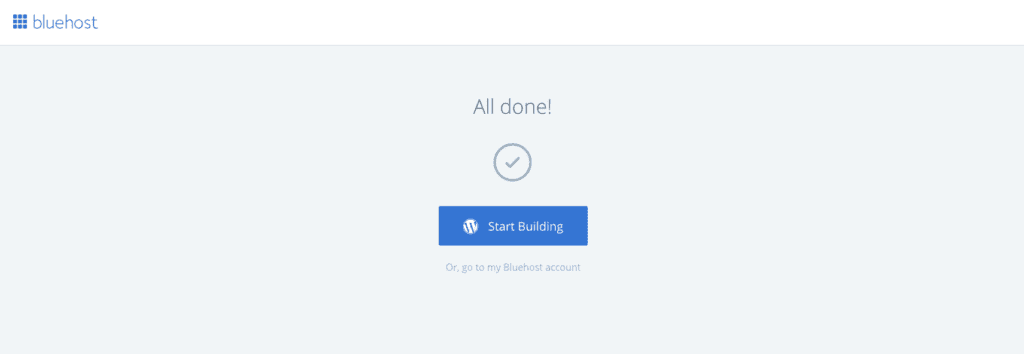
Once you have your hosting set up, it’s time to install WordPress. Remember our house analogy? If hosting is the land you rent, WordPress is what you use to build your house.
Your website runs on WordPress and this is the interface you’ll be using to build your site. Don’t worry, Bluehost makes installing WordPress super easy. You’ll pick a theme and then click the “Start Building” button to enter WordPress.
Pick a Theme
If WordPress is the structure of your house, a theme is the paint and finishes that make the house look nice and pretty. WordPress makes it easy to have a unique, professional-looking website without knowing a ton of code. They do this through themes.
When you install and activate a theme on your website, the design of that theme will be applied to your whole site. You can simply customize your menus and add posts – no scary computer programming stuff here!
There are two types of themes: free themes and premium themes. When you’re first starting out, go ahead and use a free theme while you’re learning the ropes and figuring out what layouts you like. After you’ve had your site for a while and know what you want it to look like, upgrade to a premium paid theme.
You can pick a theme in BlueHost or in the left-hand sidebar of your WordPress Dashboard, click Appearance → Themes to see tons of other free WordPress themes preloaded for you.
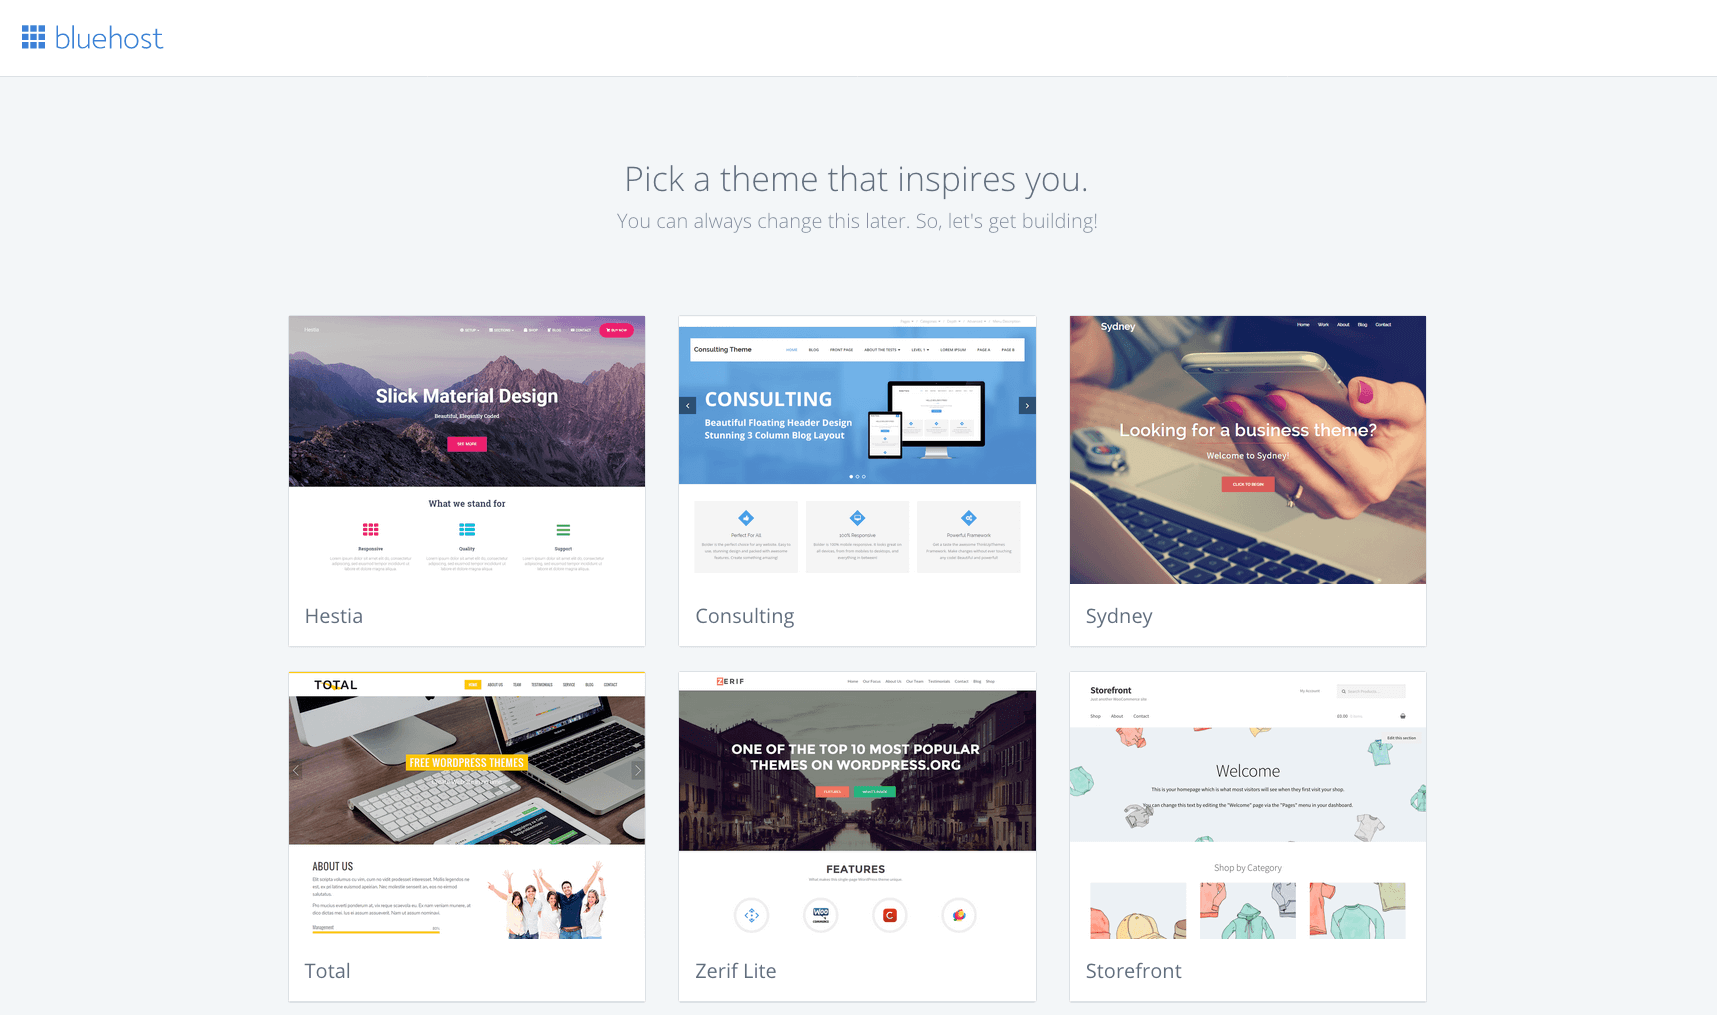
My favorite free theme is Hestia. I used it for a year on this site before updating to a paid theme. Hestia is easy to learn and it looks nice. The detailed instructions that come with the theme show you how to customize it, step-by-step.
My favorite premium paid themes are Avada and CheerUp (CheerUp is what I’m using right now). You can buy these themes on ThemeForest. CheerUp is nice because it has a ton of pre-made “skins” so you can try different looks on your site while keeping it in the same basic layout.
Avada is a powerful mega theme that allows pretty much infinite customization. Avada has incredible options and learning how to use it is user-friendly.
All themes, paid or free, come with documentation. This is a step-by-step guide that shows you to configure your blog within that particular theme.
The documentation will explain how to set up menus (the thing at the top that sorts your content) and widgets (the thing on the side with your about and recent posts).
Follow the steps to get the look you want!
Consider adding Domain Privacy Protection
Alright! You’re almost ready to customize your awesome new website. Before we head over to WordPress, there’s one add-on to consider purchasing with BlueHost.
BlueHost gives you the option to add on Domain Privacy Protection to your website and it’s worth looking into to protect your private information.
When you register a domain, your contact information is public in the WHOIS database. That means anyone could look up your personal email address and other personal information by searching your blog.
Domain Privacy Protection keeps that personal information private. It won’t be visible in the WHOIS database.
This option is not available at checkout when you initially sign up but it’s easy to go back and add it later. It costs about $15/year to add on. Here’s how to enable it:
- Long into BlueHost
- Click Domains
- Click on your website
- Click Privacy Options
- Turn the Privacy ON
- Click Save
Okay, back to WordPress and your pretty new site!
Add Plugins
Once you’ve picked a theme, it’s time to add a few plugins that will improve the functionality of your site. These plugins are like the appliances in your house, they each do small specific tasks that make your site more pleasant.
While your site will work fine without any plugins, they increase the functionality of your site without making you go change any code.
To add a plugin, go to the left sidebar in your dashboard and click Plugins → Add New, and search for the name of the plugin you want to add

After you add the plugins listed below, click the little “Activate” button next to it. This will turn it on so it’s working on your site. You can click the settings button to make adjustments to the plugin.
For example, when you activate the cookie consent plugin, it will show your visitors a generic cookie consent banner when they navigate to your page.
You can click the settings tab if you want to change the text of the cookie consent banner to something more custom or if you want to change the color. I changed mine to a pretty green color.

When you’re first starting out, add these free Plugins:
- Akismet Anti-Spam – This blocks spam from your site. It’s pretty much necessary with all the creepy spammers out there these days
- Comment Reply Notification – If someone comments on your blog, this plugin will give them the option to follow your blog and be notified of comment replies
- Cookie Consent – In the light of the recent European GDPR legislation, this plugin lets users know your site uses cookies and keeps you legal
These plugins are helpful to have later once you’ve started adding more content. You don’t need to worry about adding these right away, keep them in the back of your mind for later.
- WP Maintenance Mode – When activated, this displays a splash page that tells people your site will be back soon, allowing you to edit your layout in peace!
- Compress JPEG and PNG Images – If you’re uploading a ton of photos to your site, this plugin will compress them and help your site run faster
- Yoast SEO – This is something you won’t use right away but it’s super helpful as you start to build content and learn about SEO. Basically, this plugin helps you give your post a keyword so you can easily be found on google.
You can find plugins for pretty much anything these days. If you want your site to do something special, like display an interactive map with countries you’ve visited or display your live Instagram feed, you’ll be able to add those features through plugins.
Just google “best plugin for ___” and read some reviews. Then install the one that suits your needs.
Add Your Content
Woohoo! You made it to the writing part! Remember that About Me page you wrote way back at the beginning? And your first blog post? Time to add them to your blog!
- To add your about me page: Click pages → Add New
- To add your new blog post: Click Posts → Add New

What’s the difference between pages and posts?
Pages are unchanging, more permanent pieces of content. Things like your About Me and Contact Form will typically be classified as pages.
Posts are where you put your new blog content, the things you write every week or every month. Typically, you’ll make a few key pages at the beginning but most of the time you’ll be adding posts.
3. Spread the Word (aka: Using social media for more than memes)
Make your social media handles
Make an account for your blog on the following social media channels:
Go ahead and make new pages for your blog so that you can keep things professional. Facebook, Instagram, and Pinterest all have “Business Accounts” that are free to create and let you see analytics like how many people are clicking on your links.
This is a great way to find out what content is resonating with your readers and help you find your niche.
Make an Email List
At the end of the day, any of the popular social media platforms could go under at any time. Does anyone remember vine? Yeah. That was cool.
Having direct access to your subscribers through something other than a social media platform is beyond valuable if you’re trying to get into blogging for the long haul.
The people who subscribe to your email list are the ones who really want to hear from you. They connect to you so much that they want your new posts delivered right to their inboxes! That’s super special.
There are tons of email list providers out there, but when you’re starting out you should look into MailChimp. MailChimp is free for your first 2000 subscribers and it’s easy to use with nice-looking emails. It’s one of the best options for beginners.
When you’re ready for an upgrade, ConvertKit is an incredibly powerful email platform. But at $29/month, it’s a bit too expensive for most beginning bloggers.
It’s an amazing platform but I recommend you get this only after you’ve been regularly gaining followers and have established a bit of a following.
- MailChimp – Free up to 2000 subscribers, great for when you’re first starting out, super easy to use with nice-looking emails. The best option for newbies!
- ConvertKit – First month free and after that $29/month, super high-powered email marketing platform that lets you sort subscribers and build different sales funnels. The best option for those who are a little more established!
While we’re on the topics of email lists, you can join mine here!
How to grow an email list
The best way to grow your list at the beginning is to start with friends and family. Let them know you’re starting a blog and tell them how they can subscribe. You can share a link to join your email list on your social media accounts and with your personal email contacts.
In WordPress, both MailChimp and ConvertKit have plugins that let you embed little “Sign up for my Email List” windows on your site so you can also grow your following that way.
What should you say in your emails?
Once you’ve got a few people on your email list, you can start emailing them! You can send an email to every one of your followers using the “Broadcast” function in MailChimp or Convertkit. I like to do a monthly email broadcast that includes the following:
- Where I’m currently traveling
- What my next travel plans are
- What’s new on the blog (use this section to describe all your awesome new blog posts and link to them so your followers can check ’em out!)
- A fun/helpful travel tip
Think of your monthly email like how you would check in with friends. The people who subscribe to your email list are your most loyal fans, so give them some love in your monthly emails.
Network with other bloggers
Talking to other bloggers is a great way to get your content out there and find opportunities to collaborate. Facebook is the easiest place to start finding your community of fellow bloggers.
Here are a few of my favorite Facebook groups for promoting new posts, asking blogging questions, meeting other cool people in the field, and building a social media following:
- Bloggers Supporting Bloggers
- Travel Bloggers Social Media Sharing Group
- Travel Blogger Community: Share Posts, Ask Questions, Get Recommendations
Send me an email with your new blog
Yes, I’m a real person and I read all the emails I receive! Once you get your blog up and running, please send me a link to your blog! I’d love to see what you’ve created for two reasons:
- I want to follow you and support you and read all your stories! (dawwww)
- When you write something awesome, I’d love to share it on my platforms to help give you a boost!
4. Learn About the Blogging World (aka: How I ended up enrolled in like nineteen free blogging email courses)
You’re excited, you’re ready to learn… I feel you. I tend to get tunnel vision when I really enjoy something which means I’ll read anything and everything blogging-related for hours on end. For a while, all my free time was spent something like this:
- A webinar that will give me 5 strategies to make $10k this month? I’m all up in it.
- A free e-book about how to increase my productivity so I only work 2 hours a day but produce as much content as a small publishing house? Give me that RIGHT NOW please.
- A ten-day email course that will make me write like Steinbeck turn me into a literal unicorn? I’m so there it’s insane.
There is a TON of information out there and sometimes it’s hard to weed through what is useful and what is just blah.
So after I ended up at the bottom of a bottle of 2-buck chuck, buried deep in a mountain of free email courses and cutesy workbooks all claiming they would revolutionize my blog and make me a “six-figure figure income” (lol), I figured out this little rule of thumb.
If someone offers any kind of e-book or freebie or email course about blogging, check out the person’s actual blog before signing up. If you like their style and the content they create, only then should you charge onward.
To save you some headache, here are a few of my absolute favorite resources for learning about blogging. And because I love ya, these are FREE.
Free Resources for Travel Bloggers
- Slaying Social – My go-to spot for all things social media. Their posts about Pinterest massively improved my following. They also offer a free Pinterest email course that is seriously high quality. Definitely worth doing once your blog is ready to go!
- Smart Passive Income – Patt Flynn is kind of legend. This site is exactly where you should head if you’re interested in learning about affiliate income, growing your blog traffic, and marketing.
- Digital Nomad Wannabe – The Queen of SEO! I highly recommend you spend some time on her site.
- Canva – Free, easy to use graphic design website that lets you make logos, header images, cute Pinterest pins, custom cover photos for Facebook, business cards, ANYTHING! Super fun to play around on and make some cute stuff for your website.
- Free Code Camp – Amazing and non-scary resource for learning techy stuff. Learning a bit of coding can help you customize your website. (And it’s summer camp-themed, how adorable!)
5. Invest in yourself as a blogger (aka: My favorite course for aspiring travel bloggers)
One of the best things I did for my blog was investing in the Superstar Blogging Course by Nomadic Matt. Nomadic Matt is one of the most trusted names in the biz and his ten-week blogging business course was, in a word, amazing.
The Superstar Blogging course walks you through the entire setup process step-by-step with videos and tech support the whole way through.
After your blog is up and running, the course covers modules like how to make money (yay!), partnering with brands, creating and selling your own products, and how to get featured in bigger publications. You can read my full review of the Superstar Blogging Course here!
You can also read my guide to the best blogging courses for all levels and niches here!
6. Ways to make money blogging
Once you’ve built your blog on a solid foundation, you can start experimenting with different monetization techniques. There are dozens of ways to make money blogging, and most creators go through quite a bit of trial and error to figure out what works best for them.
Here are some of the most popular ways to make money blogging.
Affiliate Marketing
Affiliate marketing is a way to get paid for recommending products you love. You share a link to a product using your unique referral code and you earn a commission if someone purchases it. Amazon and Booking are two of the most popular companies to affiliate with but you can also find brands on platforms like Awin and ShareASale.
Ads
You might have noticed some ads on this page while you were reading. Bloggers who enable ads on their site earn money based on how many views they get on their content. Consider adding ads on your site after you’re getting some consistent traffic (around 10K monthly page views is a good milestone). I use Ezoic.
Products and Courses
Creating products and courses is a great way to make money from your website! Once you know what kind of content your audience loves, you can make products that interest them and promote them on your blog.
Sponsored Content
Brands pay you to write about their product or service on your blog. For travel bloggers, this can mean getting paid to go on a trip and write/post about it! I rarely do this kind of work but some bloggers make good money from sponsored content.
7. Go Forth and Blog (aka: Sorry if I epically overwhelmed you, but you totally got this!)
You made it to the end of this post which says you’ve got some gumption. I like that, and that tells me you’re going to do just fine.
Everyone has a story to tell. Whether you want to share your deepest travel musings or your lighthearted travel fails, shoestring budget hacks, or luxury hotel reviews, there’s a space for you here in the blogging world.
So if it’s in your heart to write, even if you aren’t 100% what you’re going to say yet, start now. You’re going to be amazing!
How To Start A Travel Blog Resource List
- Bluehost – My preferred website host
- Themeforest – Place to buy awesome themes for your blog (See Nic Wander currently uses a theme called “Cheer Up”)
- Grammarly – Post Proofreader
- Hemingway – Writing Style Editor
- MailChimp – Free Email List Builder (beginner)
- ConvertKit – Paid Email List Builder (advanced)
- Slaying Social – The place to go for mastering Social media
- Smart Passive Income – Exactly what it sounds like, a go-to resource for passive income tips
- FreeCodeCamp – Teach yourself to edit your site with some basic coding
- Superstar Blogging – Awesome comprehensive blogging course by Nomadic Matt
- Canva – Use this to make cute Pinterest graphics and logos for your blog
- Tailwind – Use this to schedule Pinterest pins (Click here for a free month trial!)
- Unsplash – Click here for free-use stock photos
- Hootsuite – Scheduling Twitter, Instagram, and Facebook posts
What questions do you still have? Let me know in the comments or by sending me an email here!
You can also check out other blogging posts here!
- 15 Best Courses For Bloggers of all levels
- Review of Superstar Blogging, Best Travel Blogging Course
- 12 Best Pinterest Courses for Bloggers
- 10 SEO Tips for Bloggers
Pin for later…


EXCELLENT EXCELLENT EXCELLENT!! Wonderful information all in one spot and I love the house analogy! Thanks!
Thank you for the comprehensive step-by-step! I needed this to get my butt in gear! Now I have no excuse to say “…but I don’t know how.” You’re amazing!!
That makes me so happy!!! Can’t wait to read your blog! Please let me know if you have any questions along the way 🙂
I have read this once already but just re read it again as there is so much AMAZING information and great advice for new bloggers… AKA ME! Thankful for this post and you !
Thank you!! Please reach out if you have any questions along the way! Can’t wait to read your stories! 🙂
Thanks so much for this post, I just came to your blog from Superstar blogging! and after looking at your recent post, I came here! This is like a goldmine! you’ve laid everything out so neatly and in a way I can easily follow!
Thank you!! I really appreciate that! Love love love the Superstar Blogging course so much 🙂
This is really helpful.. It helps seeing other perspectives. I’m currently in about 19 free email trainings! LOL
Haha yes!!! I do so many of those! Some are more helpful than others, lol!
Wow thank you for this post! I just recently launched my blog and I’m trying to learn like a million things at one time lol. I particularly like your tips on how to find your niche, and what to write in the e-mails. Really great advice!
Thank you so much and congratulations on starting your blog!! Feel free to reach out if you have any questions along the way! It’s definitely a fun process and great creative outlet! 🙂